

When utilizing an in-place upgrade to install the Windows 11 2024 Update (version 24H2) on Windows 11, the system makes a backup of the prior configuration in case a serious problem arises.
Even after installation, though, the data remain in the “Windows.old” folder, using 20GB or more, which may be a big deal for machines with low storage.
After applying the 2024 Update, Windows 11 offers many methods to recover the majority of the lost storage using the Settings app and Disk Cleanup if your PC has low storage.
After updating to the most recent operating system version, I will walk you through the process of deleting the old installation files to make room in this how-to guide.
Free up space after upgrading to Windows 11 2024 Update using Settings
After installing the latest version of Windows 11, follow these procedures to free up space:
- Open Settings.
- Click on System.
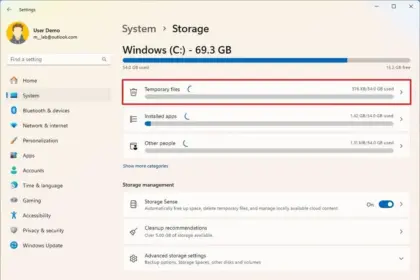
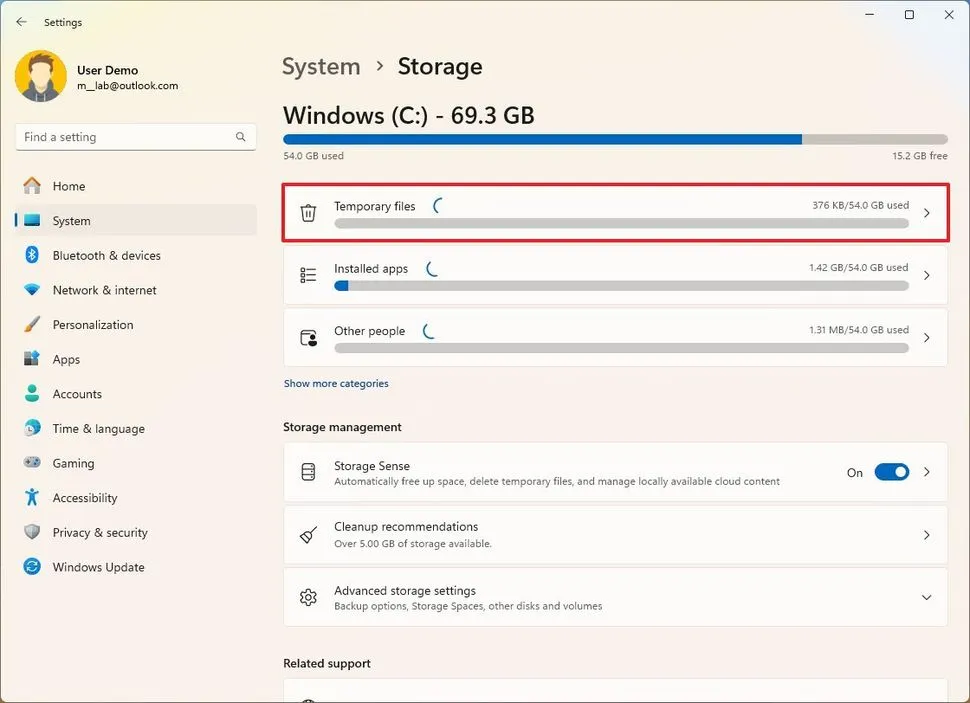
- Click on Storage.
- Click the Temporary files page on the right-side.
- Clear all the preselected items (if applicable).
- Check the “Previous Windows installation(s)” option.
- Click the Remove files button.
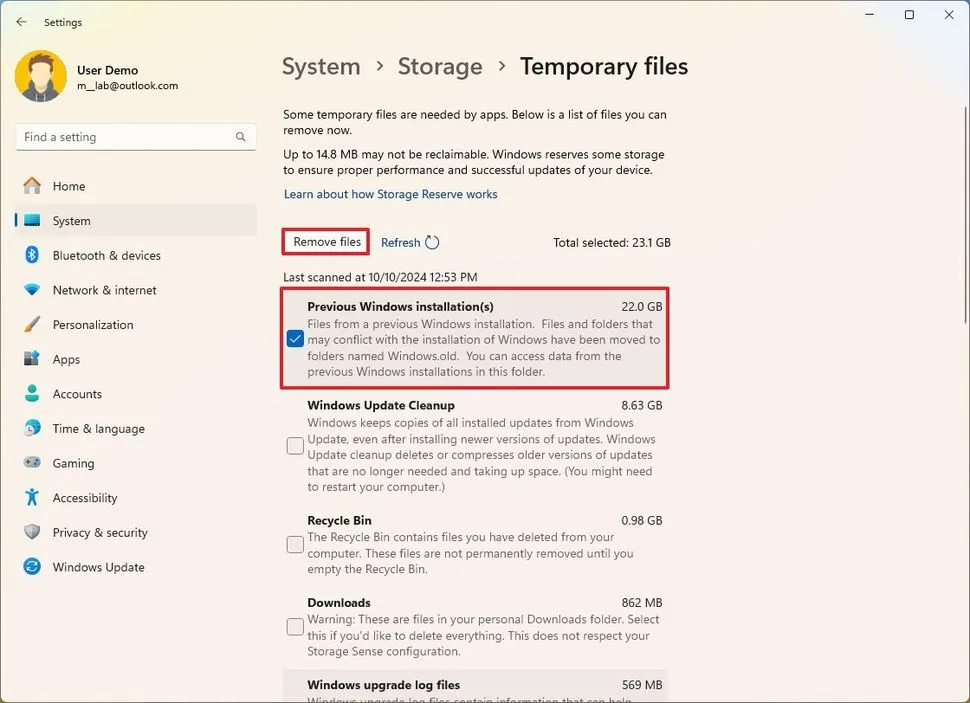
You will have extra room for more crucial files after you finish the instructions.
Use Disk Cleanup to clear up space after updating to Windows 11 2024.
After updating to Windows 11 version 24H2, follow these procedures to clear up space:
- Open Start.
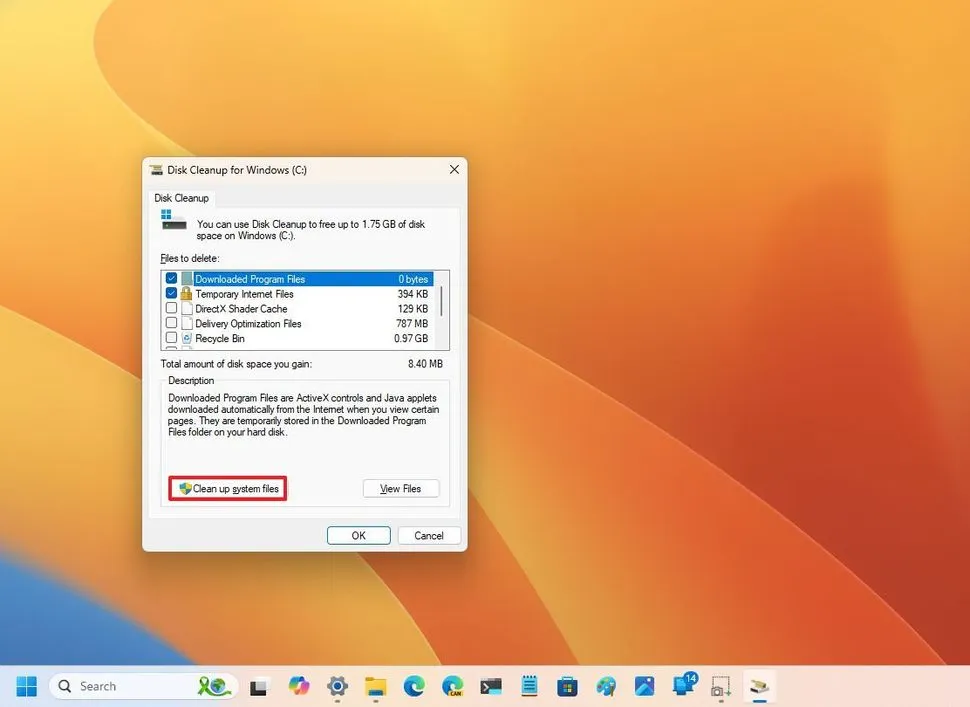
- Search for Disk Cleanup, and click the top result to open the settings.
- Click the “Clean up system files” button.
- Check the “Previous Windows installation(s)” option.
- Clear the Downloads option to avoid deleting downloaded files inside the “Downloads” folder (if applicable).
- Click the OK button.
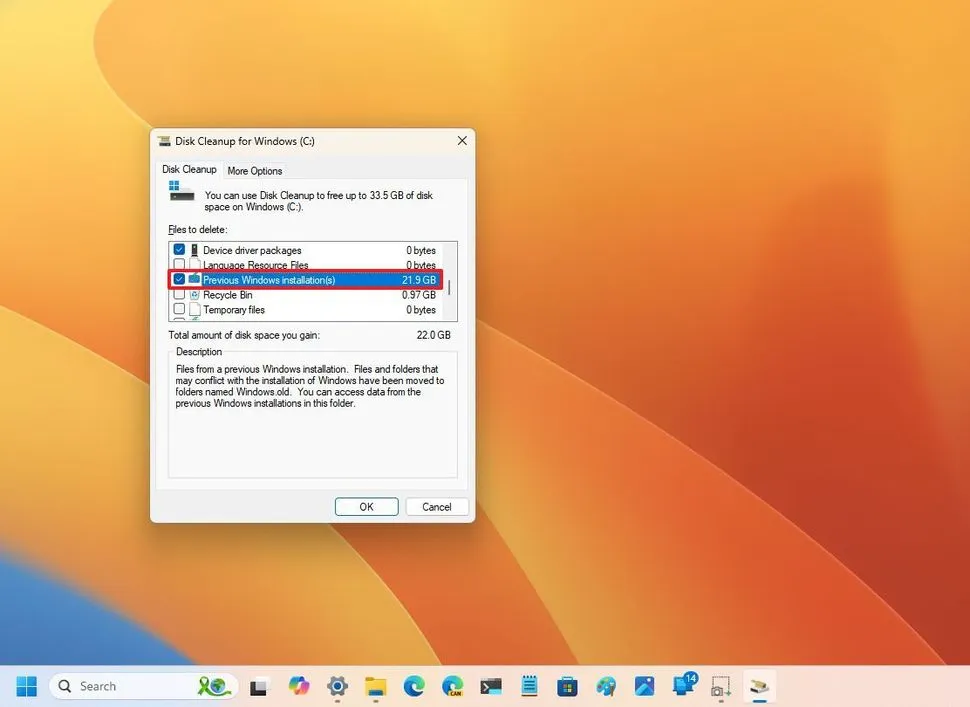
The procedure will remove the old installation files once you finish the procedures, freeing up space on the installation drive.
During the first ten days following the upgrade, you can choose to remove the backup files from a prior installation. The system will automatically remove files after that time.
Additionally, you will not be able to use the recovery settings to go back to the prior installation after you have deleted the files. If you have the installation media, you can still perform a clean installation to reinstall version 23H2.
Notably, several customers have been complaining of problems while attempting to delete the “Windows Update Cleanup” cache, which holds copies of installed updates. Nevertheless, this has nothing to do with deleting the data from an earlier installation.