The BIOS (Basic Input/Output System) loads your operating system and all of the customized settings that make your computer special the first time you turn it on. Understanding how to access the BIOS on Windows 10 or 11 PCs is crucial, whether you need to do so to optimize your system settings, troubleshoot problems, or upgrade your BIOS to support new hardware.
What is the BIOS?
The internal core processor software called BIOS is in charge of starting up your computer. It is the most crucial startup application on your computer. Before the operating system loads, it conducts a POST (Power-On Self-Test) to make sure all connected devices are functioning properly.
BIOS also handles low-level system functions like:
- System security
- Booting
- Hardware initialization
- System clock and time
- Hardware component configuration
Newer UEFI overcomes the shortcomings of the outdated BIOS; it can run in 32- or 64-bit modes and supports drives larger than 2.1TB.
Why Use Advanced Startup to Access BIOS Setup?
here are several reasons you may need to enter BIOS setup:
- Change the boot order to boot from a USB drive or DVD
- Update BIOS to support new hardware
- Overclock the CPU or enable XMP profiles for faster RAM
- Troubleshoot hardware issues
- Restore default settings
- Set a BIOS password for security
A necessary first step in completing the instructions below is to access and edit the system’s basic settings by entering the BIOS.
How to Access Windows 10 and 11 BIOS Setup
On current Windows PCs, there are two main ways to access the BIOS. Knowing how to do so is essential for troubleshooting and adjusting the firmware settings on your machine. Method 1 entails turning on your computer again and holding down a particular key as it boots up.
The manufacturer may change this key, although it usually looks like one of these: F1, F2, F10, DEL, or ESC. To correctly enter the BIOS setup, you must press the right key as soon as the manufacturer’s logo displays, but before the operating system loads. Method 2 bypasses the need to press a key during bootup by utilizing Windows’ advanced starting options to navigate to the BIOS. Use these techniques to access the BIOS through Windows settings by using advanced startup:
- Open Settings by clicking the Start menu and selecting the gear icon.
- Go to Update & Security > Recovery.
- Under Advanced startup, click “Restart now.” The computer will reboot to a special menu.
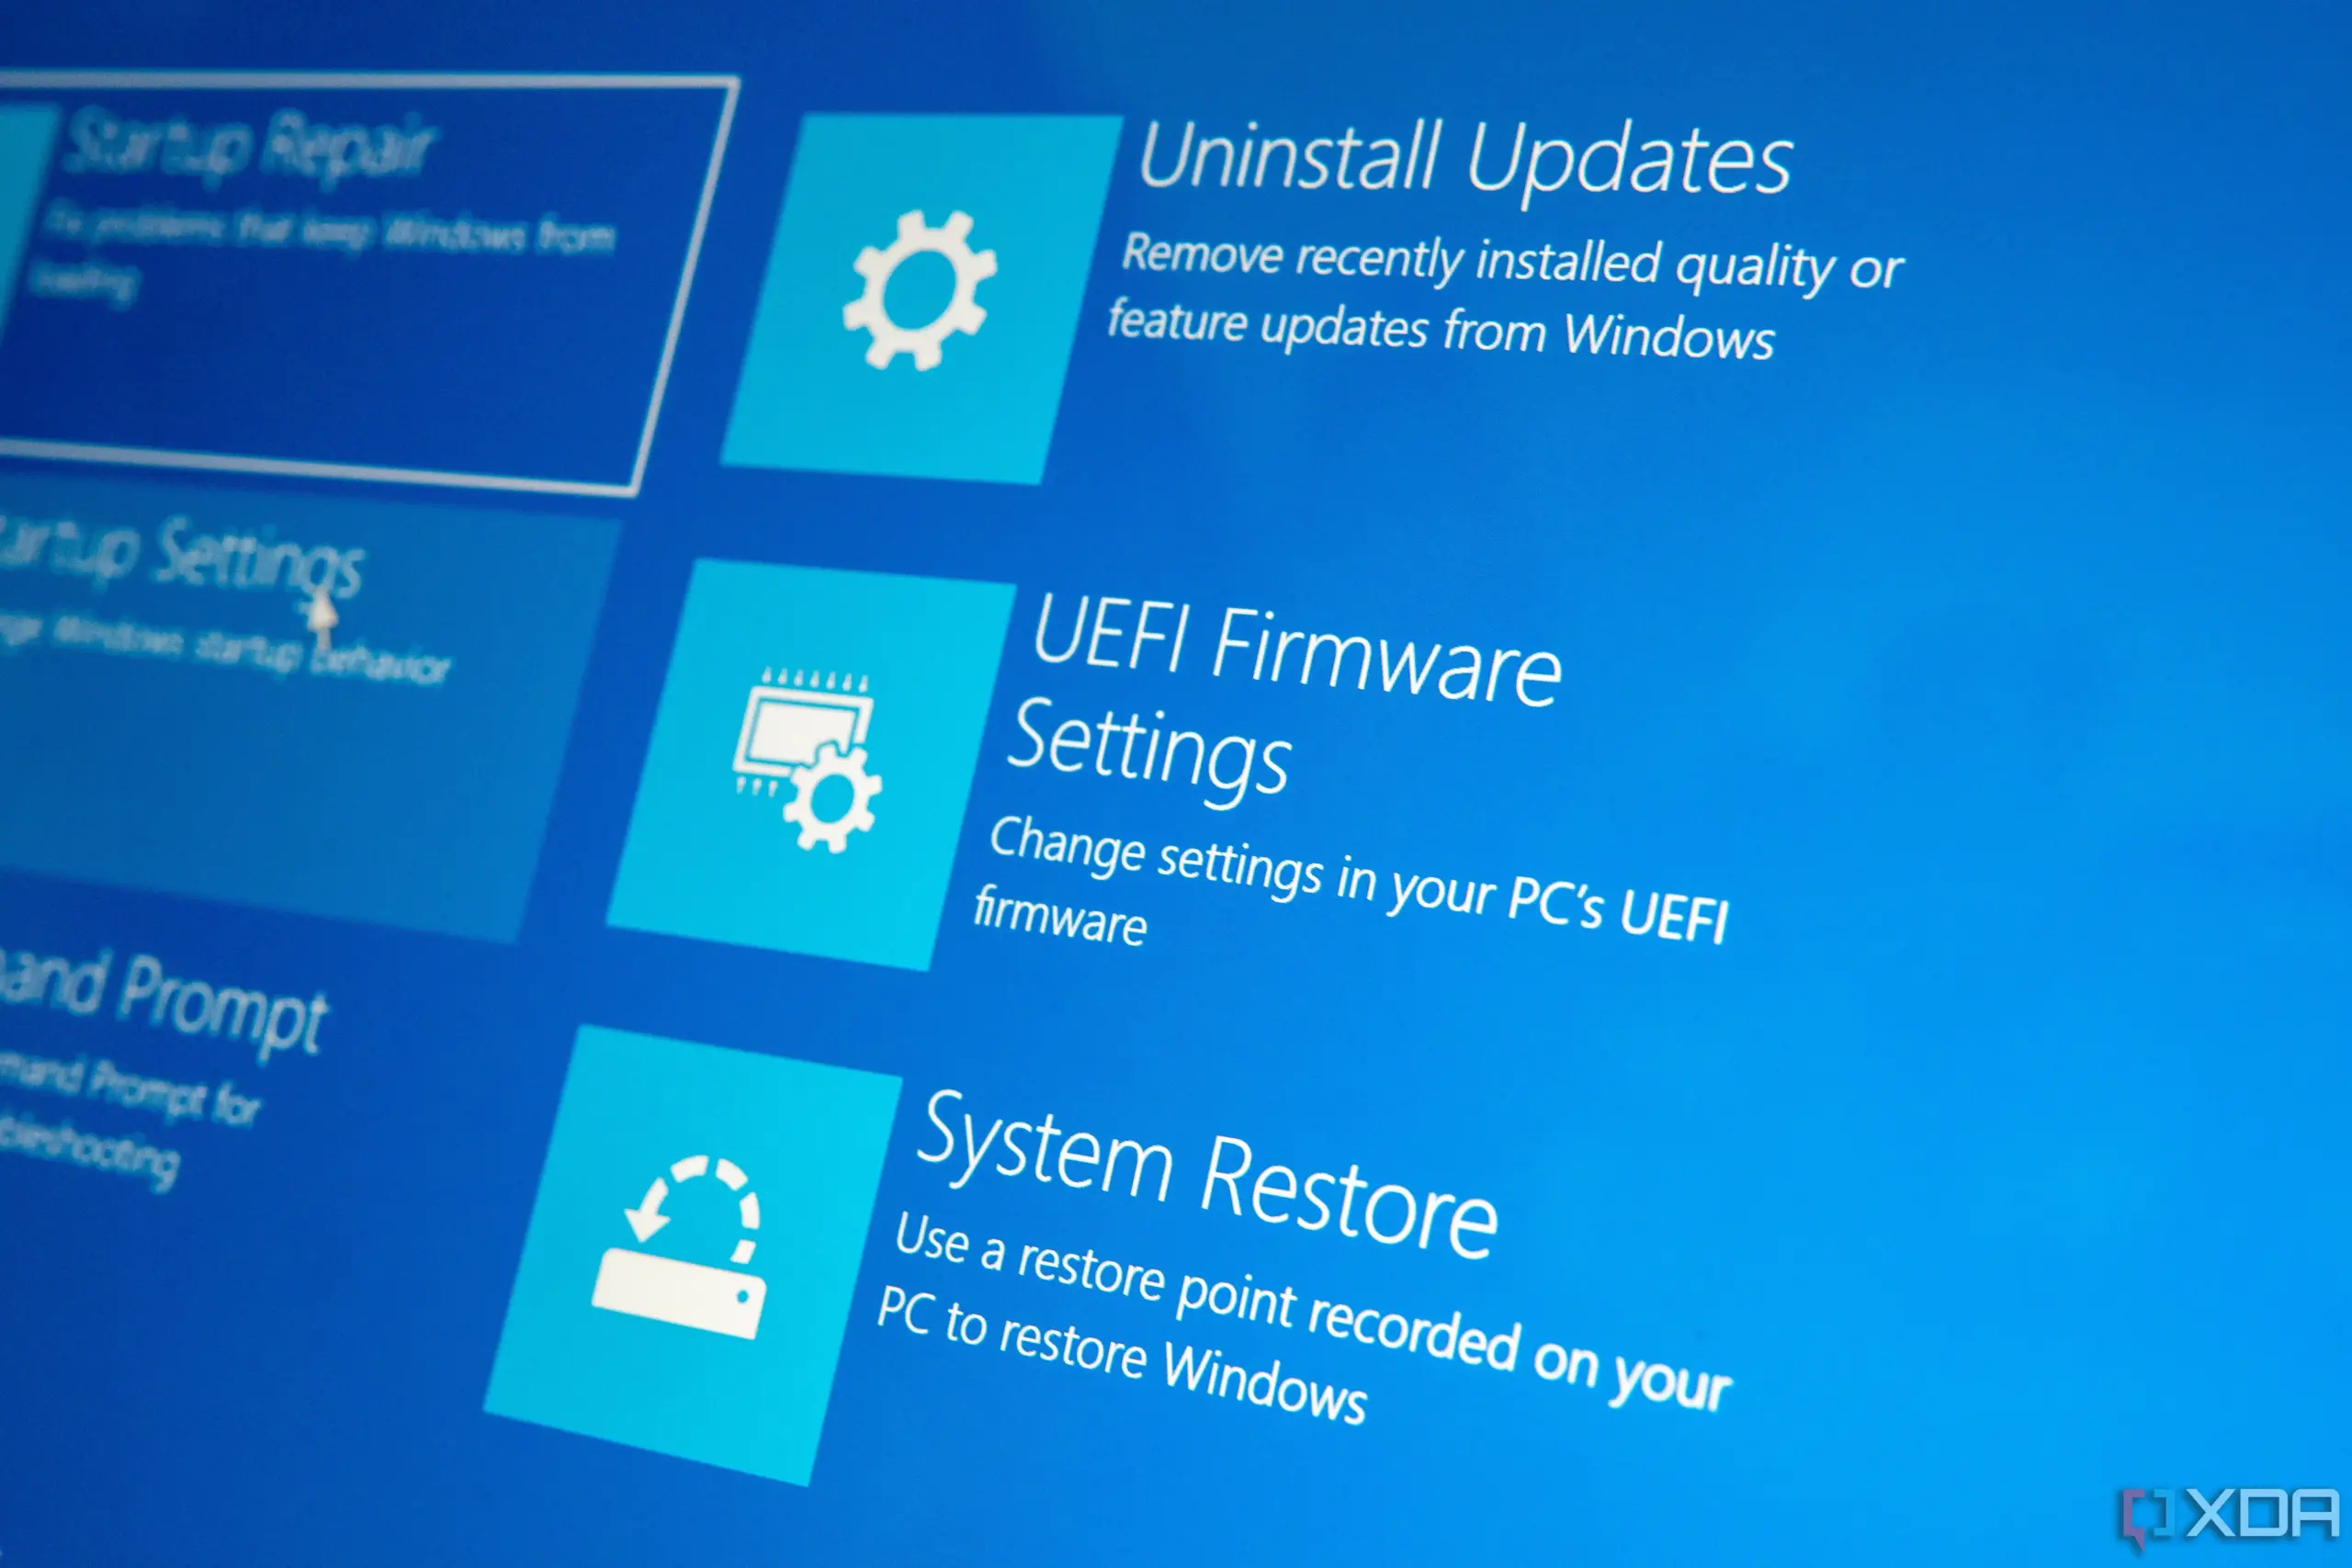
- Choose Troubleshoot > Advanced options > UEFI Firmware Settings.
- Click UEFI firmware settings, then click Restart to change the settings in the BIOS.

This technique is especially helpful for systems where using the conventional key-press startup method is challenging due to the fast boot functionality.
The pace at which the operating system loads, particularly when options like Fast Boot are enabled to expedite the boot process, might impact when the BIOS is accessed.
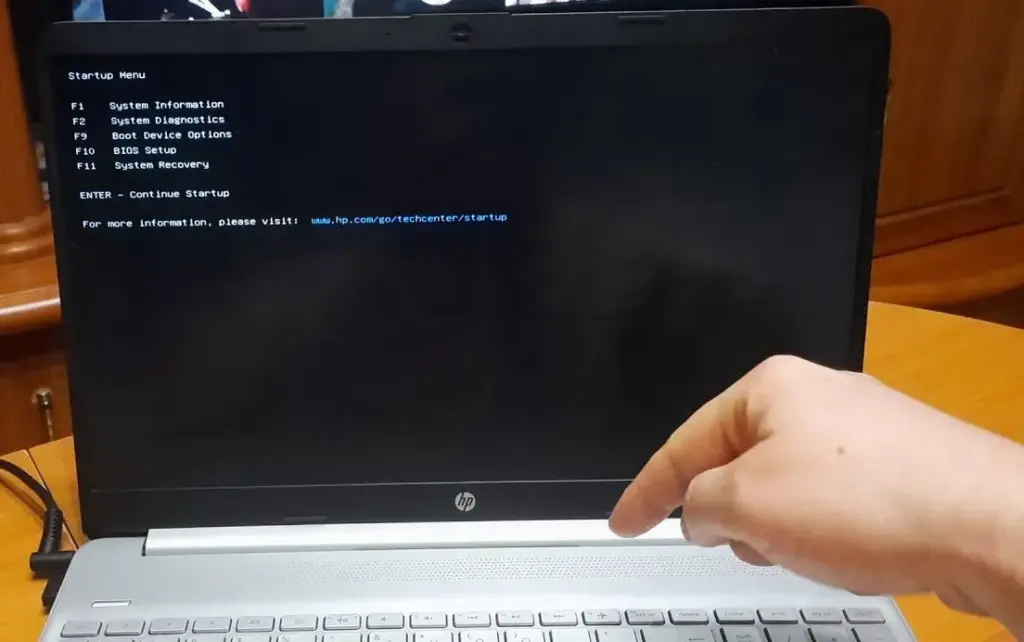
Method 1: Use the BIOS Key During Startup
- Restart your PC.
- When the manufacturer logo appears, press the designated BIOS key repeatedly until you enter BIOS setup. Common BIOS keys by brand include:
- Acer: F2 or DEL
- ASUS: F2 or DEL
- Dell: F2 or F12
- HP: ESC or F10
- Lenovo: F2 or Fn + F2
- MSI: DEL
- Use the arrow keys to navigate the BIOS menu.
Some PCs boot too quickly to hit the BIOS key in time. In this case, move on to method 2 below or try disabling Fast Startup in Windows.
Method 2: Use Windows Advanced Start Menu to Access UEFI Firmware Settings
- Click Start and select Settings.
- Go to Update & Security.
- Under Recovery, click Restart now.
- On the Choose an Option screen, select Troubleshoot.
- Click Advanced options.
- Select UEFI Firmware Settings.
- Click Restart to reboot into BIOS.
Solving BIOS Access Problems
If neither of the above methods work, try these troubleshooting tips:
- Disable Fast Startup in Windows Power Options
- Use an emergency boot disk to access BIOS if your PC won’t boot normally, especially if the boot device is not recognized, which may require accessing BIOS to troubleshoot issues such as missing or corrupted bootloader, failed boot attempts, and system halting errors.
- Clear the CMOS to reset BIOS settings to default
- Remove the CMOS battery for a few minutes to reset settings
- Contact HP Customer Support for further assistance
For emergency boot situations, consider keeping a USB emergency boot drive on hand.
Navigating BIOS Menus
Once you’ve entered BIOS setup, you’ll use the arrow keys to move between menus and settings. Typical menus include:
- Main: Basic system info like date, time, and BIOS version
- Advanced: Configure hardware components and features like CPU, USB ports, and virtualization
- Boot: Set boot order and enable/disable fast boot and secure boot
- Security: Set passwords and configure TPM
- Exit: Save or discard changes and exit BIOS
Be cautious when modifying BIOS settings as incorrect changes could cause system instability or prevent your PC from booting properly. If you’re unsure about any settings, it’s best to leave them at default.
Understanding how to access BIOS empowers you to make low-level changes to customize and optimize your PC. While you should avoid changing settings unless you’re sure about the outcome, getting to know BIOS puts you in full control when you need it. With the information and methods provided here, you’re well-equipped to enter BIOS setup on your Windows computer when necessary.


