Windows’ split-screen view is useful for reading documents, comparing product designs, or just monitoring several things at once. You no longer need to constantly jump between tabs or programs thanks to this functionality, which lets you view and interact with two or more windows at once.
For instance, you can go at research documents with a social media feed or music app open on one side, or you can use a spreadsheet to reference crucial data while chatting with coworkers on a video call. There are countless options.
Using split-screen mode to run multiple apps at once is very useful when using a large display. By keeping everything arranged on a single display, it helps make the most of screen real estate. Additionally, this removes the need to configure several monitors.
By snapping open apps to half, a quarter, or different corners of the screen, you can quickly arrange them side by side in Windows’ split-screen mode without having to manually resize each window.
We will walk you through turning on and utilizing the split-screen capability on your Windows 10 or 11 computer in this post so you can maximize the available screen real estate.
Enable the snap windows feature
On your Windows 10 or 11 computer, you must first activate the Snap windows function before you can organize apps in various split screen layouts. To achieve that, follow these steps:
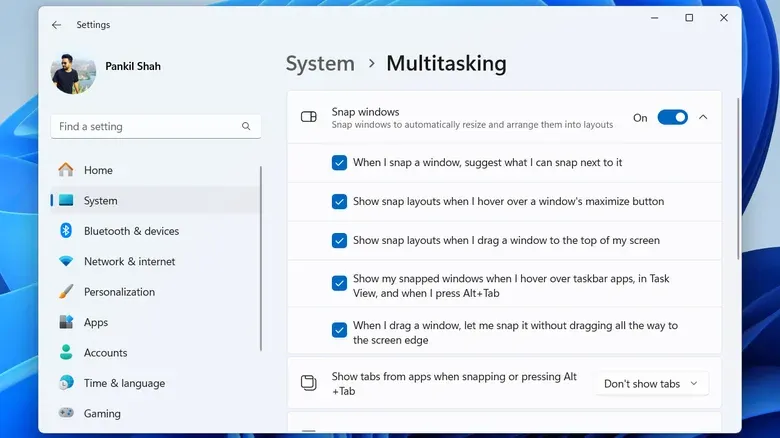
- Press Windows + I on your keyboard to open the Settings app.
- On Windows 11, go to the System tab in the left pane and click on Multitasking. If you’re using Windows 10, click the System option and select the Multitasking tab on your left.
- Enable the Snap windows toggle.
Then, by clicking the arrow next to the Snap windows toggle, you can change how this function operates. For instance, you can adjust snapping actions, like showing snapped windows in Task View, or enabling snap recommendations to sample layout possibilities when you hover over the maximize button.
There are other methods to divide the app windows on your screen once you have activated the Snap Windows functionality.
How to split screen on Windows
Drag and drop is one of the simplest ways to arrange apps in split-screen mode. This can be accomplished by clicking and holding a window’s title bar, dragging it to the left or right border of the screen until a transparent outline shows up, and then letting go of the mouse. On that side of the screen, the window will snap.
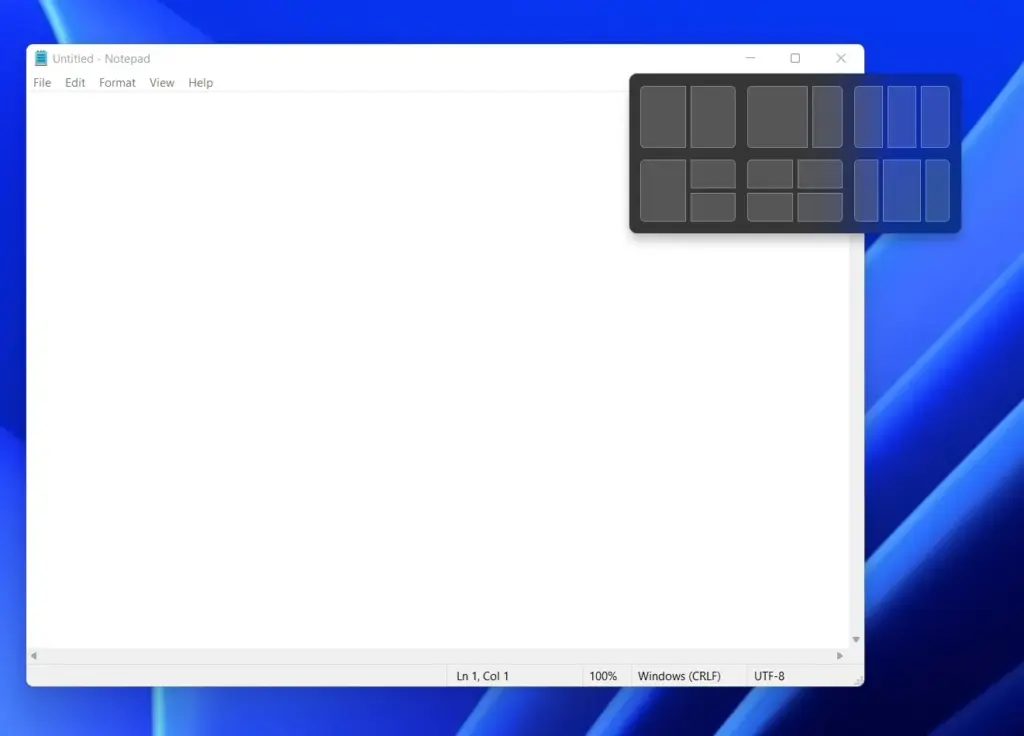
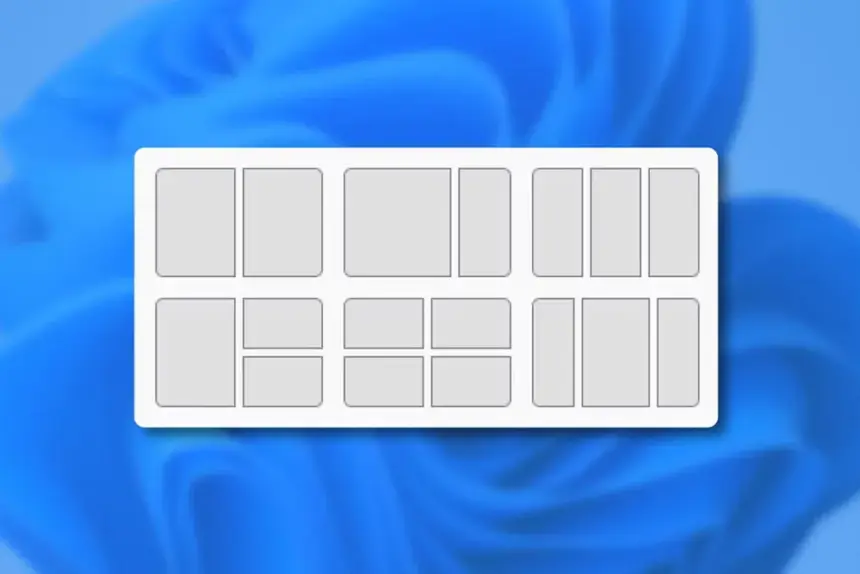
On Windows 11, you may also choose your favorite layout by moving your mouse pointer over the maximize button in a window. Windows will show your other open apps and documents in the remaining split-screen regions after you place the first app. After that, you can click a thumbnail to load your preferred app in the other area.
Keyboard shortcuts are another effective approach to divide your screen. You can move a window to different parts of your screen by pressing the Windows key and one of the arrow keys.
For instance, the active window can be moved to the top half with the Up arrow, to the left with the Left arrow, and to the right with the Right arrow. Press Windows + Z (Windows 11) and use the numeric keys to swiftly arrange your open programs in different configurations if you want to experiment with different layout possibilities.
You can change the window widths after your apps are in split-screen mode by dragging your cursor over the corner or edge. The other windows will automatically adjust their sizes to reflect the modifications.


